Teachers Pay Teachers Facebook Bloglovin' Pinterest Twitter Instagram Image Map

July 28, 2014

Monday Made It

Linking up with Tara from 4th Grade Frolics is just too much fun! There are so many great ideas out there and we love checking out everyone's creativity!

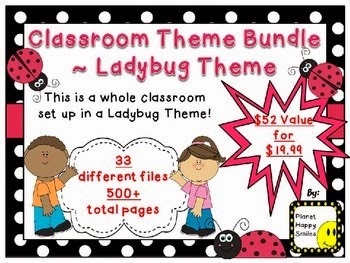
Our BIGGEST accomplishment this summer would be the HUGE Classroom Theme Decor Bundles we have created.

They are $19.99 for over 500 pages and by buying it in the bundle you save over 50% off! 
All Sets include:
1. Complete Calendar/Weather set (22 pgs)
2. Helper Jobs – 63 different jobs and header (15 pgs)
3. Classroom hall passes – 12 different passes (12 pgs)
4. Word Wall Alphabet Cards – large (13 pgs)
5. Word Wall Headers &150 S.W. cards (32 pgs)
6. Sight word cards (editable) (1 pg)
7. Welcome banner (9 pgs)
8. Desk name tags (6 pgs)
9. Wall name plates to display work (7 pgs)
10. Skill banners (8 pgs)
11. Learning Objectives posters (editable) (9 pgs)
12. Note cards (editable) – different sizes (7 pgs)
13. Newsletter (editable) (8 pgs)
14. Getting to know you form (editable) (1 pg)
15. Rules, Rewards, Consequences posters (8 pgs)
16. Helper/Reader sign up sheets (4 pgs)
17. Birthday chart (editable) (2 pgs)
18. Yes/No Graph (editable) (24 pgs)
19. Sharp/Unsharp Pencils signs (2 pgs)
20. Behavior Clip Chart (20 pgs)
21. Table Colors/Numbers (12 pgs)
22. Toolbox Organization Labels (editable) (4 pgs)
23. Tote tray Supply labels (16 pgs)
24. Stars & Wishes Class donations (editable) (19 pgs)
25. U.S./Texas Pledge posters (4 pgs)
26. Centers/Stations signs (173 pgs)
27. Schedule cards (29 pgs)
28. Homework Club (5 pgs)
29. Parent Communication Log (editable) (5 pgs)
30. NOISE! Posters (3 pgs)
31. Number Wall/Cards (20 pgs)
32. Alphabet cards (14 pgs)
33. Student Binder Cover & Spine (editable) (2 pgs)

We have created 9 different sets and are in the process of adding more.  Our next set to hit our store will be a "Camping Theme." If you have a set in mind that we have not done, just email us at planethappysmiles@gmail.com
We love to take requests for products!

Here are the links to the bundles, just click on the pictures below:


Our BEST selling bundle is the Super Hero Theme Bundle with over 20 sold.
We appreciate your support of our work!

Thank you so much for viewing our Monday Made It!
We are very excited about how many people have added us to their list of TPT sellers to follow, we hope you will too!
Happy Decorating!
Karen and Alison


July 21, 2014

Monday Made It ~

Another week has passed and now it is time to link up with Tara from 4th Grade Frolics!

This week was all about the spray paint and Duck Tape!!!
The first project was just about spray paint ... I found these mats at the Dollar Tree and they came in pink and aqua.  Really pretty colors but they did not go with my room.  What I loved about them was that they had a border around the edge to frame what the kids were doing on the inside.  It would have been a bonus it they came in black, but they didn't.  So ... I grabbed a can of spray paint and painted just one side. 


I love the way they look and they seem more durable with the way the spray paint hardened the placemats.

Colored numbers just seem to POP on the black!  I can't wait to use them during small group time.
Here it is pictured with my numbers for place value!


My next project was updating my clipboards.  They looked ratty from the kiddos making marks on them.
I sprayed them black and then added the zebra duct tape.  Easy Peasy! 

 The last project I tackled was painting and reinforcing the edges of the offices my kids use.  I find that painting them helps to make them last longer, saves the Earth, and the kids like them better.  When I taught kinder I painted them all with smiley faces and they lasted for over 10 years.
We hope you like our Monday Made It!


Now for a little tip ...
We have been playing with the covers of our Pinterest boards and updating them with the "Cute" Covers.  The cool thing about this is ... you can get them for FREE!!!  All you have to do is repin them, add them to your boards, and make them your covers!!!  We are not done with all of them, but we will be soon!

Here is a sample of mine:
click on the picture to get to our boards

I also found a terrific set on TPT!
You can get a free set made by "Reading with Mrs. B" here:
click on the picture to get to here free file!
Don't forget to leave some feedback love if you grab her freebie ~
We all love that positive feedback!

Happy Monday Made It!
Karen & Alison


July 12, 2014

Classroom Organization ~ July 12

Hello! We are so happy to be blogging again today about organization.

This is a backtrack to yesterday's post about labeling and setting up a GREAT library or in our case, 4 libraries.
Each one has it's own color scheme and it helps the children know where to put the books back.

Training the kids on how to put back books is a little time consuming in the beginning, but it will pay off throughout the year in time saved for you!
(This was at the beginning of our setting up our rooms, it is a little rough!)


This is our "Heart's Desire" library.

This is our "Non-Fiction" Library:


This is our "Favorite Authors" library.
The matching critters go in each book box, but they had not made it in yet! Plus our own kids were playing with them that day!


This is our "Just Right Readers" library, star readers, and book hospital.


We hope you got some ideas from our library.  This year we will add our updated labels ... Yahoo!

Now onto new topics ...


If you have made or are making the popular crate seats, you might want to try this ...

If you have big holes, like mine, you may want to measure our poster board and line the inside.  I found that this is a great way to add color and to hid what is stored inside.
Plus if you put small things inside, they do not fall out!
I made labels for what was in each one and that saved the guessing game ... now that I could not see through the holes.  I loved it so much better.
My crates were from an older project and I recycled them for my seats.
Newer crates have smaller holes & you may not need to do this.

One thing I made years ago were the color clips for my paper sorter. This is another great idea for kids.  It really helps them see where different colors go.  Now your teacher helper/paper sorter can restock without needing any help.
It is another time saver for you!
I used binder clips, made the tiny labels, attached them and then clipped the binder clips to the shelf.
I love how neat the sorter stays.
You could also use hanging file folders in a crate and label them the same way.

The last tip of the day is about binders/folders.  These are great for organizing papers, keeping up with documentation, subs, emergency planning, etc.
Here are some of our binders/folders:
These are the monitoring notebooks used to control paper work on each child.  We use two binders for each class.
Organizing your binder from the beginning makes it so much easier to keep up with. If you number your kids, you could number the inside tabs of the binder & then never have to label it with names again!
This is a floppy folder for taking out during fire drills, evacuations, etc.  You never want to need it, but it is great to have if something does happen.  I keep all of my students contact info in it, school plans for emergencies, allergy/health info, etc.  It makes you feel more prepared in case there is an emergency!

We also make binders for our subject areas and themes.  These are great for storing all of your papers for each subject.

We hope you have enjoyed our blog today!
Happy Organizing!
Karen & Alison

July 11, 2014

Classroom Organizational Tip ~ July 11th

Hello! We are so happy you are visiting our page!  We would love for to follow our little blog, our TPT store, on Facebook, etc!  We have so much to share!

We are back talking about organization, here we go...


If you do not have a toolbox, We encourage you to get one.  You will love it!  We loved ours so much, we got one for our home offices, too!  You can find so many different templates out there, just make sure they will fit your drawers.  Not all toolboxes are created the same!

Here is one of our "Happy" designs.  This HUGE one is what we us in our classrooms.  We have other teachers who do not have one come to us to grab something.
They are SUPER handy!

Karen's home tool box:
Karen laminates her pieces first and then hot glues them on the front of the drawers. Takes a couple more steps, but they are very durable.  The labels also POP better because they are not behind the plastic.
You could use clear packaging tape, too.
Both these designs can be found in our TPT store along with several others!
Click here to see what we have to offer.
(We can always design one to match your room!)


Our next tip is organizing all of your "Yes/No" or Daily Question graphing materials.

A great classroom tool for so many reasons!  The kids love seeing where their friends put their cards, easy to take attendance, great discussion topic for morning meetings, etc. They are Terrific!!!

If you change out your "Question of the Day" every morning then you have a ton of cards!
We have found that by using one of these accordion file organizers is terrific!

Here is what we did:
We got on of those accordion file holders and labeled the outside with a simple label and the inside with every category/theme we used.

Then we filed the cards in each pocket.  Some we rubber banded together to keep them in the order we wanted to use them.

Other ideas:
You could use a binder and clear sleeves to store them in. You could also use those zipper pencil bags, too!
Find an option that works BEST for you and have fun organizing!  

Haven't tried a "Yes/No" or daily question graph in your room? You can check out our sets in our store.  They may help you get started!
Click here to get to our graphs: 


We find accordion bags are a great way to organize!  Here is another way we have used them.

Labeling your classroom can be daunting task!
Before you even begin, you really need to think about how you want it to look, how it will work for your students, will it be crowded when the kids are shopping, what you can keep up with, etc.
After a great deal of planning, research, and lots of conversations with other teachers ...
(Thank you so much for your input Betty Melker!!!)
we decided we were ready.

We planned all of our labels for the baskets and books.  Created them and printed them on cards and labels.
We then needed a system.  It was too much to have all of those labels spread out all over the tables.

We decided to organize them by the type of library they belong in.  Ex. Non-Fiction, Heart's Desire, Just Right Readers, etc.  It is really nice if you can find a friend at your school organizing at the same time.  Alison and I worked together on this project a few years ago and if I ran out of a label, I could just grab one from her and keep working without having to stop and deal with printing.  We also could bounce levels off of each other. 

These are our holders for our labels for our library.  

When not in use, they stay in here:

Here is what they look on the inside of each one:


  This organization made creating the BEST library for our kids possible!

Here are my book baskets with their labels ... 

You can find our basket labels in our store, the book labels are coming soon!
This set has over 200 basket labels!
We are in the process of making more sets in a variety of backgrounds.

We hope you found something today that might help you in your classroom.
Thank you so much for stopping by!
Happy Organizing,
Karen & Alison

LinkWithin

Related Posts Plugin for WordPress, Blogger...